Saturday, January 30, 2016

"the tastiest crap ever" aka chocolate pudding cake

There's a special time of the month when my love for dark chocolate transforms into a rabid, insatiable need, only trumped by water and oxygen.  My thoughts become flooded with chocolate raaainnn; I find myself drifting into the pantry at odd hours of the day (and night), in search of any-godforsaken-thing chocolate.

CHOCOLATE!!!!! CHOCOLATE!!!!!
This was one of those times.

Flash forward to Friday night, when we were thumbing through recipe books and the vast interwebs for the ultimate chocolate dessert. After passing on treasures like fruitcake brownies (I can't believe those exist, either), Meka came upon Holly's hot fudge pudding cake.  Joy later christened this The Tastiest Crap Ever. Because it looks like crap. It really, really does.

Judy's bowl of tasty crap cake. 
But it's unfair to call this cake the Tastiest Crap Ever. That's setting the bar too low. It's probably more accurate to call this the Crappiest Looking Tastiest Cake Ever, but that's also a lot of words. 

In addition to its sludgy appearance and intoxicating yummy-ness, there's one other thing you should know before making this cake. It uses the weirdest cake recipe, ever. But as it turns out, this amalgamation of weirdness spells deliciousness.

Specifically, the wet cake batter is first topped with a dry batter mixture, which is then flooded with boiling water. I repeat, the final step of this recipe entails pouring boiling water all over the cake batter. Say what?

Well, it shouldn't serve as a surprise that an unconventional recipe would produce an unconventional cake. But hey, unconventional can be a good thing. Especially when it creates this gooey, lava cake-esque masterpiece!


So...if my repeated references to fecal matter hasn't spoiled your appetite yet, I highly, highly recommend you make this cake. I give it 5 stars and a smiley face - no, a shiny Michelin for its ability to kick chocolate craving butt like no other.


Thursday, January 28, 2016

(year of the) monkey banana walnut bread

Voila!
On a frosty winter night, me and two trusty minions gal pals - Judy and Joy - sat around a table pondering the fate of two very brown, pungent bananas.

Cakes and muffins were too #basic, we thought. In the end, we embarked on the lesser traveled path to make spiked monkey bread. You see, there is a tendency for the bizarre and inexplicable to manifest in the College Kitchen. After unsuccessfully combing the internet for the recipe of our visions, we were left improvising throughout the night.

For the first time ever, Judy kneaded bread dough. I figured she would excel at this, given her experience as the household masseuse.

"Doesn't it feel just like like human flesh?!" I asked her. She disagreed. (Perhaps I should keep these kinds of thoughts to myself.)

Later on, our cheeky attempts to spike the sauce were snuffed when the bourbon boiled off some in the cooking process and then all in the baking process. Wump. Ah well, still nommy!

At midnight, the monkey bread emerged from the oven. Like pure magic - a warm cinnamony pull-apart bread bejeweled with walnuts and caramelized bananas. As a forewarning for anyone who tries this (which you should), when we un-molded the bread, we also opened the floodgates of a delicious caramel waterfall. Truly, I'm not exaggerating. Just ask Judy and Joy, the angels who cleaned up the hot mess. Isn't that what gal pals are for?

Monkey bread is best eaten fresh and perfect for sharing. Joy reminded me about the dairy-free, coconut-based version I made last year. Now, we have a new fantastic recipe for an almost dairy-free (but easily substitute-able) banana walnut version! That night, we pulled out all the excuses and came close to consuming the bread in its entirety. Oops. Maybe if I do this more often, I'll grow a booty worth shaking. Senior sixteen? Senior sixty? Oh, I don't know. I'd like to say that what happens in the college kitchen, stays in the college kitchen, but it looks like I might be carrying it around my hips soon enough. With this bread - no regrets.

banana walnut monkey bread
Drool, baby, drool.
sweet monkey bread dough 
(adapted from Karlynn Johnston's recipe here)
2 Tbs butter, melted (can sub coconut oil)
1 cup of milk, warmed (I used soymilk)
1/3 cup water, warmed
1/4 cup white granulated sugar
2 1/4 teaspoons yeast
3-4 cups bread flour
2 tsp salt

spiced sugar mixture
1/3 cup white granulated sugar
2 tsp cinnamon
1/2 tsp cloves

sauce
3/4 cup brown sugar
3 Tbs butter (can sub coconut oil)
1 cup milk (I used sweetened vanilla almond)
1 tsp vanilla extract
1/3 cup chopped walnuts
1/2 tsp cinnamon
optional: 2 Tbs bourbon

other
2 bananas, very ripe

to make the dough
1. In a microwave safe bowl, combine the butter, milk, water and sugar.
2. Microwave the mixture until the butter is melted and the mixture is smooth.
3. When the mixture has cooled to ~115 F, add the yeast. Let bloom for 5 minutes.
4. In a separate bowl, combine 1 cup of the flour and salt.
5. Pour in the yeast mixture, mixing and adding more flour until a moist dough forms.
feat. Judy, bread kneading apprentice
6. Continue kneading dough and adding flour/water as necessary, until dough ball is smooth.
7. Allow the dough to rise in a greased and covered bowl for 1 hour.
to make the sauce, while dough is rising
1. In a sauce pan, combine the sugar, butter, almond milk.
2. Heat the mixture on med-low and stir until everything is dissolved.
3. Continue heating the mixture on low-med for 10 minutes. Let the mixture boil for 1 minute.
4. Let the mixture cool for 5-10 minutes.
5. Add in the bourbon, vanilla, walnuts and cinnamon.
6. Simmer the mixture on low for 3-5 minutes. Cool for 10 minutes prior to using. It will appear very liquid-y for now, but rest assured it will thicken when baked.
to assemble the monkey bread
not yet baked, prior to adding sauce
1. In a greased bundt pan, pour a shallow layer of sauce. Add a layer of thinly sliced fresh banana and walnuts.
2. Roll out the dough and divide into ~40 pieces. Roll each piece into a ball shape.
3. Dip the dough balls into the sauce.
4. Then, dip them into the spiced sugar mixture.
5. Arrange the dough balls into the pan.
6. Alternate a layer of dough balls with scatters of walnuts and thinly slices of banana.
7. After you've finished adding the dough, pour the remaining bourbon sauce all over the top. It will look like a lot of sauce, but rest assured that it will thicken and reduce while baking!
8. Bake at 375 F for 30-35 minutes, until the sauce is thick and bubbling. Let cool for a few minutes before un-molding it over a curved plate (be warned that lots of sauce will pour out!). SERVE WARM AND FRESH because no other way will do this justice!! :) You can also garnish and dip fresh banana slices in the sauce.

Garnish with fresh bananas, which you can dip in the sauce! :)

Thursday, January 14, 2016

strawberry oatmeal crumb bars

Throwback to my first baking adventure of 2016 - and it was a good one!

In traditional Chinese culture, you start the new year by eating something sweet, so you will have a "sweet" year. These strawberry oatmeal crumb bars are buttery, sweet-but-not-overly-so and conjure memories of summer.

I made these as a (not very conventional) new year's treat that conveniently uses up the rest of my homemade no pectin, no problems strawberry jam. Also, I'd been craving a chunky dessert. But do I really have to justify making these? Nah!

I adapted the recipe from Dinner, Dishes and Desserts, by readjusting the yield, reducing sugar to let the jam's sweetness come through even more, and incorporating oatmeal into the base. My parents (especially my father) were big fans of these bars. My father kept asking how the oatmeal got to be so crumbly and good; I'm pretty sure it's just the magic of butter, combined with some oven toasting action and love, the secret ingredient that makes everything taste better.


strawberry oatmeal crumbs bars (adapted from Dinner, Dishes and Desserts)
bar base
1/2 cup butter, softened and diced
1 1/4 cup all-purpose flour
1/4 cup oats
1/4 cup white or brown granulated sugar
dash of cinnamon

jam
~1/2 cup strawberry jam or jam of your choice (I recommend a chunky one)

crumb topping
1/3 cup oats
1/4 Tbs cup brown granulated sugar
optional: coconut flakes, cinnamon

Yields 9 medium bars or 12 smalls bars

To form the base
1. Combine softened butter, flour, oats, sugar and cinnamon until thoroughly combined and moist. You can use a mixer on low speed or mix by hand.
2. Press roughly 3/4 of the total mixture - or enough to create a full layer on the bottom - into a greased 9x9 pan.
3. Bake at 375 F for 10-15 minutes, until lightly golden.
To create the jam layer
4. Spread the jam evenly over the baked base.
To add the crumble topping
5. To the leftover base mixture, add more oats, brown sugar and any optional additives.
6. Combine until moistened, or until it clumps together when pinched. If the mixture is too dry, add more softened butter by the tablespoon.
7. Distribute chunks of the topping mixture over the jam, until the entire layer is covered.
8. Bake at 375 F for 20-25 minutes, or until crumb topping is golden brown. Let the bars cool well. If you can, refrigerate for an hour or overnight to help it firm up. Enjoy! :)

Thursday, December 31, 2015

food resolutions of 2016

I have an infinite plethora of plans for 2016. Among them include finishing my thesis, graduating college and getting a job. In between the tears and long date nights with black tea and my textbooks, I am really, really looking forward to...

5 THINGS TO MAKE IN 2016

homemade vanilla/mint extract
Enough of the diluted, pricey nonsense! The moment I turned 21, I've been itching to head to the liquor store and buy a nice, big bottle of vodka. And while many other freshly 21 year-olds may experience that same "itch", they probably aren't also planning to stuff their precious liquid courage with mint leaves or vanilla beans...Well, what can I say, I have a giant mint bush in my backyard, calling my name.


baked donuts (a dairy free and vegan version)
The first time I tried baking donuts (which was, like, one week ago), I made something else. Let's just say my visions of a glorious tower of mini matcha donuts - stacked to resemble a Christmas tree - didn't translate so well into reality. They were crumbly and chaotic, and most important, I can totally do so much better. I look forward to spending the coming 366 days finding the dairy free or vegan donut recipe of my dreams.
*sob* Anyone up for crumbly donuts?
black sesame 
I love black sesame desserts in indescribable ways. Their taste is reminiscent of peanut butter, and there's a Chinese belief that it'll keep hair black 4eva (although at the moment I'm not sure it could be any other color). I love it so much that I will happily and shamelessly down cup after cup of black sesame soup, much to the curiosity of my housemates, to whom it probably looks like I'm aggressively slurping down black tar. Well, I pretty much do eat everything, so.. Hence, I think it would be a fun idea to devise some recipes (perhaps bread? mochi? cake?) that make black sesame the star of the show.


(ratchet) mochi
Who knew we could recreate this ancient, laborious traditional dessert with a microwave and the right ingredients? Ah, the *magic* of technology. I'm honestly curious how microwave mochi will turn out, and whether it can achieve the same impossibly pillowy texture. On the topic of black sesame, one of my favorite black sesame desserts is black sesame mochi.

The time-honored, labor-intensive tradition of making mochi.
Versus, the borderline sacrilegious 10 minute version of making mochi. 

chickpea water aka aquafaba
Aquafaba, or chickpea water, is the new-ish ingredient transforming the vegan baking world. Believe it or not, you can whip the chickpea brine (yes, direct from the can) into a fabulous egg-white substitute. Life-changing, I know. I tried doing this for my sister's vegan birthday spongecake, and sure, I failed miserably, but I learned 3 crucial lessons: 1. Aquafaba is indeed witchcraft and whips up beautifully like egg whites. 2. Chickpea brine is, well, briny. Duh, right? It impacts the taste of what ever you are making. 3. My whip attachment does not reach the bottom of my mixing bowl, which explains why, for the longest time, my mixture failed to whip properly.


Finally, in honor of a fabulous 2015 and to another year of kitchen adventures, here are photos of the vegan birthday sponge cake I surprised my sister with. 

I present to you: Green tea sponge "roulade" with homemade strawberry jam & vegan carob whipped cream. And a hint of chickpea brine. One of my proudest creations yet. 


Wow, what an appetizing color combination.


Resist your urge to lick the screen. Please.

Happy new year!

Friday, December 25, 2015

green tea "wreath" rolls (happy holidays!)

Last Christmas, I made wreath bread.
This Christmas, I did some experimenting and made these "wreath" rolls, colored with green tea powder and filled with festive flavors like cinnamon. I have a big weak spot for green tea-flavored anything, so I wanted to enhance the green tea flavor in these as well. However, I confess I went too green tea-happy (there's such a thing?!) because the bitter punch of my green tea icing was a bit overwhelming; next time, I will readjust the flavors. Aside from that, this dough recipe produces incredibly soft rolls (think super soft dinner rolls), so it will make a great base for more vegan breads. 


green tea rolls [v] 
dough
1/2 cup + 1 Tbs dairy-free milk, warmed (I used cashew)
2 Tbs vegetable oil, warmed
1 Tbs coconut oil
2 1/4 tsp yeast
1 Tbs white granulated sugar
1/4 tsp salt
2 Tbs matcha powder
approx. 2-2 1/2 cups all purpose flour, more or less as needed

filling
3 Tbs coconut oil
1/4 to 1/3 cup white granulated sugar
1 tsp molasses
1 tsp cinnamon
1/4 tsp ginger
1 Tbs matcha powder
optional: 1/4 cup crushed walnuts or pecans

optional icing
1/3 cup icing/confectioner's sugar
1-2 Tbs dairy free milk
optional - matcha powder, cinnamon, nuts, etc.

1. Combine the warmed milk and oils, sugar, yeast, salt and matcha powder.
2. Add the flour until a soft dough forms. Let it rise in an oiled, covered container in a warm place for 1 hour, or until it doubles in size.
3. To make the filling, combine all the filling ingredients.
4. After the dough has finished resting, roll it out into an approx. 9x13 rectangle.
5. Distribute the filling over the dough, and roll the dough up, long-wise.
6. Slice the roll into 8-10 pieces.
7. In a parchment lined pan, arrange the dough rolls into a circular "wreath" pattern.
8. Bake at 350 F for 25 minutes. Once cooled, add icing if desired. Enjoy fresh! Store leftovers in an airtight container.

Happy holidays! :)

Thursday, December 24, 2015

green tea donut "christmas tree"


All it's missing is the star on top.

A few months ago, I got my hands on this fabulously adorable miniature donut pan. As a donut and green tea fanatic, I had glorious visions for this "Christmas tree" made of aromatic, cakey donuts - visions that didn't quite translate into reality, as my first attempt at donut-ing produced this rather sad and crumbly excuse. Surprisingly, my family consumed these quickly, but they're a bunch of weirdos, so...

Anyhow, this recipe is going into the Great Book of Bakefails. Now to console myself with some cheesy donut puns of encouragement:
Do-nut use this recipe ever again.
Do-nut worry, there's always a next time.
Do-nut give up!!

Tuesday, December 22, 2015

coconut buns [df]

My father is a man of few words. In the 21 years I've been on this earth, I've learned my father rarely has an opinion on anything apolitical. For instance, he has no favorite color and no favorite music. Which is why, on the rare occasion that he does start a sentence with "I like...", I perk up and latch onto every word that follows. Imagine a rabbit listening for predators. Yup.

The other day, my father said three magical words. "I like coconut." And since I'm always open for requests a.k.a. excuses to bake, he then asked me to make something with coconut.

I found this seriously fantastic coconut buns recipe by Sarah from The Woks of Life and made some adjustments to make them friendlier to my digestive system (dairy-free) as well as amp up the coconut flavor (using coconut oil). I also made a few buns using homemade strawberry jam, per my mother's special request. *It was more difficult to fill the buns with jam because of how wet they are, so if you do try it with jam, I suggest using 1-1 1/2 tsp at most.

These coconut buns have a fairly simple recipe with simple ingredients that happen to be dairy free and absolutely delicious - especially when fresh and warm out of the oven. Both my parents really enjoyed these, and my father said he would buy them in a store. Huzzah! Success! So if you're a coconut lover and/or nostalgic for some asian bakery bread, I highly recommend giving this recipe a go. :)

Sesame seed stripe = strawberry jam; sesame seed center = coconut flakes.
Homemade strawberry jam & coconut flake filling

coconut buns [df] (adapted from The Woks of Life)
bun dough
1 1/2 cup dairy free milk, at room temperature or lukewarm (I used cashew milk)
1 egg
1/4 cup white granulated sugar
~4 cup all-purpose flour, more or less as needed
1 Tbs active dry yeast
1 1/2 tsp salt
1 Tbs coconut oil

coconut filling
5 Tbs coconut oil
3 Tbs confectioners/icing sugar
3 Tbs all purpose flour
1/2 cup sweetened coconut flakes

topping
(for egg wash) 1 egg, beaten
(for decoration) sesame seeds

1. In a bowl, combine milk, egg, sugar, flour, yeast, salt and coconut oil.
2. Combine -either by hand or in a mixer with a dough hook - into a soft and smooth dough, adding more flour or water as needed.
3. When the dough is formed, let the dough rest, in a covered and oiled bowl, for 1 hour.
4. While waiting for the dough to rest, combine all the filling ingredients.
5. After 1 hour, punch the dough down and knead to get the air bubbles out.
6. Divide the dough into 12 equal pieces. If you want to be precise, you can use a food scale.
7. Roll each piece out into a rectangle; smooth on the filling; roll it up; pinch and smooth the edges until a smooth bun forms. Check out Sarah's awesome photos for reference.
8. Let the buns rest for 45 minutes.
9. Brush with egg wash, and decorate with sesame seeds.
10. Bake at 350 F for 16-18 minutes. Serve fresh! Store any leftovers in an airtight container.

Wednesday, October 7, 2015

white chocolate pumpkin brownies


white chocolate pumpkin brownies [df]
1/2 cup all-purpose flour
2 eggs
1 tsp vanilla
3/4 cup brown sugar
1/3 cup cocoa powder
1/2 cup oil (I used corn)
1/2 tsp baking powder
1/4 tsp salt
1/3 cup milk (I used coconut)

1 cup canned pumpkin puree
1 Tbs flour
1 Tbs brown sugar
1/2 tsp cinnamon
1/4 tsp nutmeg
1/4 tsp ginger

1/2 cup white chocolate chips (dairy free options exist)

1. In a bowl, combine the brown sugar, oil, vanilla, eggs and milk.
2. In a separate bowl, combine the flour, cocoa powder, baking powder and salt.
3. Combine the wet and dry mixtures until the brownie mixture is moistened.
4. In a separate small bowl, combine the pumpkin puree, flour, brown sugar, and spices. Mix in a couple spoonfuls of the brownie batter.
5. Pour the brownie batter into a greased pan. Pour the pumpkin mixture on top. Pour the white chocolate chips over it all.
6. Take a utensil and swirl all the layers together, until the pumpkin mixture and chocolate chips are incorporated throughout.
7. Bake at 350 for 35-40 minutes.

These brownies are basically the love child of a polyamorous relationship. White chocolate and pumpkin, and more chocolate. So there. I just introduced these brownies to you in the most bizarre way possible. But don't leave yet - I really hope you make these because they are actually worth a try.

I first made these brownies back in March in an effort to use up old pumpkin puree. They didn't turn out as fudgy as I had hoped for. The pumpkin gives the top layer a super soft, creamy texture, and I knew I had to perfect it. They are *almost* dairy free - almost, until you get to the white chocolate chips, which I wasn't aware until recently that there existed dairy-free substitutes for. 

Thursday, August 13, 2015

the spatula incident & blueberry coffee cake

Today was the last day of my summer internship, and I decided to bake some homemade goodies as a farewell/thank you treat for the office. I woke up at 6AM to start mixing the ingredients for this blueberry coffee cake, a recipe I'd tried before and liked. As I creamed together the butter and sugar with some aggressive hand-to-spatula action, I suddenly realized that a tiny chunk of the spatula...was missing.

Oh, shoot... Where did it go...?

oops.
I stared down into the butter and sugar mixture, poking around it with waning conviction before realizing how hopeless the situation was. I tried melting the mixture in the microwave, in an attempt to separate solid from liquid. But that failed, too.

I loathe cliches, but this is really like searching for a needle in a haystack.
The butter and sugar mixture was simply too grainy, and most troublesome of all, vaguely white-ish and translucent - just like the spatula. Instead of potentially feeding silicone bits to my unsuspecting coworkers, I chose to dump the butter and sugar mixture and start all over. Sigh.

So, I learned an important lesson today. I should be gentler on my spatula babies. To be fair, this one withstood 3 years of regular use before giving out.  Next time, I will look for a brightly-colored spatula, so if this situation ever strikes again, I can more easily detect the silicone.

Rest in peace, spatula friend. You were my great and loyal kitchen assistant.

...On the bright side, here's a great blueberry coffee cake recipe! I didn't get a chance to take a photo since I was running out the door. And then my coworkers devoured it. As usual, I made some recipe adjustments, which I'll detail below.

blueberry coffee cake
1/4 cup butter, softened
1/2 cup white granulated sugar
1 egg
1/2 cup milk (I used almond)
1 1/2 cup all-purpose flour
2 tsp baking soda
1/2 tsp salt
1 cup blueberries
optional: a touch of lemon juice/zest never hurts

topping
4 Tbs white granulated sugar
3 Tbs all-purpose flour
1 tsp cinnamon
4 Tbs butter, softened

Follow instructions as listed. Bake at 350 F for 50-55 minutes, until topping is golden.

Friday, July 24, 2015

lemons and limes...curd (butter-free!)


There's something I find irresistible about citrus. The sharp scent, zingy taste, the bright colors - I can't get enough of it. To me, citrus is the epitome of summertime and happiness. And that's exactly how I'd describe this bright yellow lemon curd.

I made this early in the year, while I was still back in school and living in the dorms. That week, I found some lemons on sale and thought about using them in an apple pie, but you might have noticed by now that things never seem to go as planned - especially in my kitchen. 

On a late Sunday night, this is what happened instead:
"Jessie, should I make lemon curd?"
"Yes."
"Should I make it right now?"
"Yes."
And that was that.

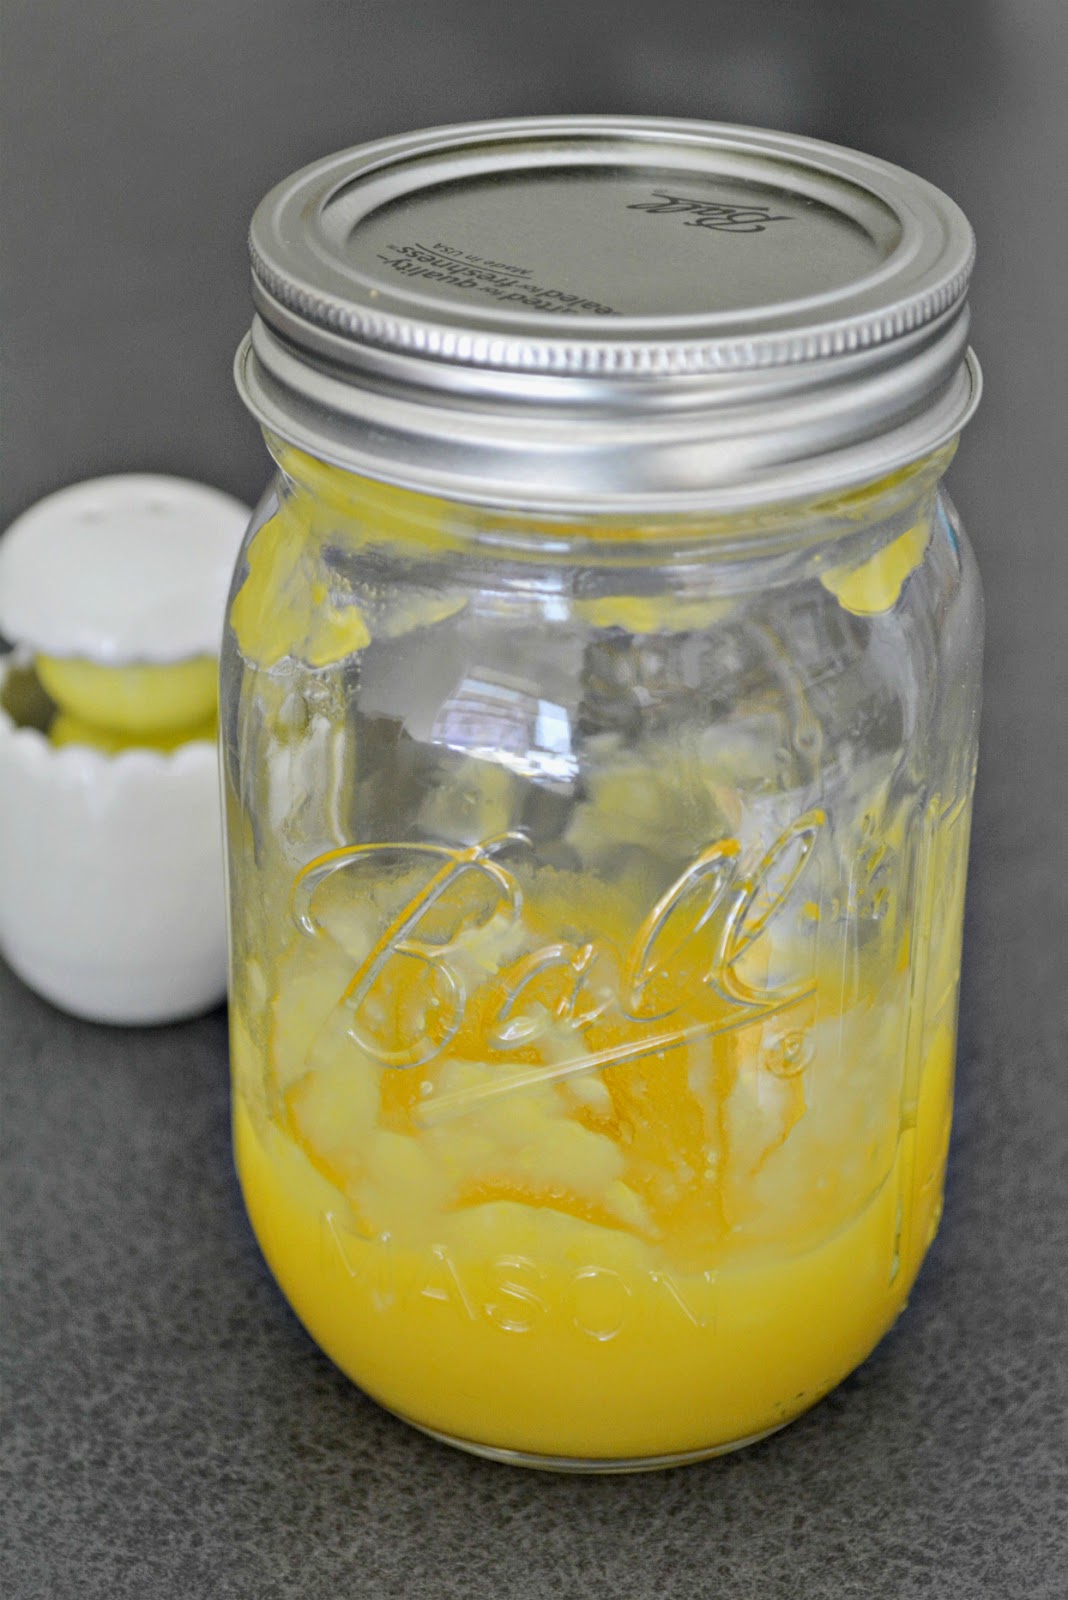
I was surprised to learn that many lemon curd recipes contain butter, which kind of weirded me out because I certainly don't think of butter when I'm eating lemon curd. But then, there was this this no-butter lemon curd recipe by Mandy on Food.com, which has (much-deserved) great reviews. I also eliminated the recipe's vanilla extract because, just like with butter, I didn't see a need for it in my lemon curd. (I'm nitpicky - sorry, not sorry).

The curd turned out fantastic! It deals a powerful, fresh lemony punch to the taste buds. It's not overwhelmingly sweet like some storebought versions; instead, you get a bit of that lip-pinching tartness that jolts you awake! And if you need any more reason to make this: know that this was very easy to make because it requires little ingredients, utensils and time. Plus, it leaves your utensils and kitchen smelling like citrus :)

Luckily, I had the best lime wedge squeezing machines (a.k.a. Judy and Joy) to assist in this endeavor.
Fast forward a week or so, and Judy and I were hanging at a campus-sponsored event to scrounge around for leftovers. (cue obligatory hashtags: #nomealplanproblems #noshame) One of the event's main courses, pad thai, came with two containers filled with just lime wedges. While others made a beeline for the pad thai, we took the limes because we're cool like that. (Well, we did grab the leftover fried rice, too!) You know how the saying goes: When life hands you lemons and limes... make curd!

butter-free lemon/lime curd (adapted from here)
Zest of 2 lemons/limes (approx. 1-2 tsp)
Juice of 2 lemons/limes (approx. 1/3 to 1/2 cup)
4-5 Tbs white granulated sugar
1 egg

Yields approx. 100-200mL 

1. Zest and juice the lemons/limes. 
2. In a pot over the stove on low heat, stir and dissolve the sugar with the juice.
3. Add the zest, and continue stirring for a minute.
4. In a separate heat-proof container, beat an egg. While continuously whisking the egg, very carefully add in the hot lemon/lime mixture. You want to be careful not to cook the egg. Whisk well.
5. Pour the lemon and egg mixture back into the pot, and place it on low-medium heat. Keep on stirring until the mixture bubbles a bit and noticeably thickens.
6. Turn off the heat. Pour the lemon curd into a heat-proof container, and let it cool. When it reaches room temperature, refrigerate it.

Wednesday, July 8, 2015

NYC: Best Vegan Ice Cream

For the lactose intolerants, dairy-allergic and vegans baking under this mid-summer heat, vegan ice cream is the answer. There is one vegan ice cream store in my hometown of Boston: FoMu. But there are several vegan ice cream shops throughout NYC - which is why, when I visited New York last week, I was ecstatic and determined to try them all! Limited by time and my wallet, I visited 4 locations with plenty of dairy-free ice creams. Here are my tried-and-tested, honest opinions.

Sweet Jane’s in Astoria, Queens
Closest stop: Astoria Ditmars Blvd
Price: $4.50 with tax/scoop (1 flavor)

Sweet Jane’s is a small ice cream shop in the far off Astoria suburb of Queens, at the end of the N/Q train. For a cute neighborhood ice cream shop that serves up regular and allergan-conscious ice cream, they offer an impressive number of both dairy and dairy-free options. It's also one of the most affordable options in the city.

Peanut butter with toasted coconut
After sampling many vegan options, I've determined that Sweet Jane's ice cream is not as sweetened or creamy as some other vegan options in the city. My favorite flavors are Mai Tai, which tastes like passionfruit, and Peanut Butter, which complements well with crunchy coconut flakes. Unfortunately, their serving size was disappointingly small; as you can see in the photo, my scoop was dwarfed by the cup and spoon. For almost $5 a pop, I was expecting more. I also noticed they didn't offer water on the side, which other ice cream shops did.

Mint almond cookie

DF Mavens in East Village, Manhattan
Closest stop: Astor Place
Price: $4.90 with tax/cup (1 flavor)

DF Mavens, which sells its ice cream by the pint in Whole Foods, recently opened its first store on the grungy-hipster corner of St. Marks Place. You can buy your smoke pipe, get a tattoo, sip on boba and eat vegan ice cream all on one street. DF Mavens is a godsend for us dairy-freeks who miss the feeling of being able to walk into a store and order anything from the menu. They’re entirely dairy free, so you can blindfold yourself, pick out anything from the menu and hey, it won't give you diarrhea!

For nearly $5, the ice cream was delicious and the portions were fairly generous, relative to what other vegan ice cream shops serve.  But: it just wasn't mind-blowing. Admittedly, I'm a mint ice cream snob who judges vegan ice cream shops by their mint ice cream, and I found their Mint Almond Cookie to be on the sweeter side with not enough mint. What will keep me coming back are the good vibes, fair amount of seating and the plethora of options to try.

Alchemy Creamery @ Smorgasburg in Williamsburg, Brooklyn
Closest train: depends on which Smorgasburg you visit
Price: $5/pre-made push pop; $6/cup (1-2 flavors); $7.5/cone

At a somewhat scary $6 per cup, Alchemy Creamery's ice cream might as well come topped with solid gold sprinkles. Speaking of toppings, their ice cream comes with free toppings (For the price, though, why shouldn't they?!). When I visited, they were offering approximately 5-6 flavors of ice creams and sorbets.

Alchemy Creamery's ice cream is the kind of delicious that you never want to end and that you remember forever. What struck me about their ice cream was just how wonderfully creamy it was; I doubt a dairy-lover could tell the difference. I got the Peanut Butter (incredibly rich, peanut butter lover's dream come true) and Chocolate Chai (mostly chai, with a hint of chocolate).

But alas, the price! The price is too steep for my student budget. A treat from Alchemy Creamery will be reserved for those really special days.


Van Leuuwen Artisan Ice Cream in Boerum Hill, Brooklyn
Closest train: Bergen St
Price: $5.25 with tax/regular cup or cone (1-2 flavors)

Dark chocolate and Mint Chip
Van Leuuwen functions as an ice cream shop and truck that sells both dairy and vegan ice cream. They have several locations; I visited the one on Bergen Street, which is conveniently located just steps from the train.

At $5.25 for a cup, this is easily one of the pricier vegan ice cream options. The portions are smaller, but their ice creams pack a flavor punch.

What’s makes them one of my favorites is that all flavors are simplistic, but really well made. I’m not sure how to explain this, but Van Leuuwen manages to capture the essence of the flavors. For instance, their Mint Chip deals a minty kick; their Dark Chocolate is rich with a dark chocolate bitterness; the Pistachio was nutty and the Salted Caramel was actually salty. It just tastes so satisfying.  Flavors tasted like how they should taste, and even better. I sampled all five and loved them all. There's no artificiality or overbearing sweetness here.


Can't wait to try
Blythe Anne's
Oddfellows Ice Cream Co.
The Ice Cream House
Healthy Nibbles
Klein's Ice Cream House
Sustainable NYC

Thanks for reading!

Sincerely,
A Slightly Broke Vegan Ice Cream Connoisseur Wannabe 

Saturday, July 4, 2015

easy "patriotic" ice cream


All you need is:
blueberries
ice cream (I used Trader Joe's soy vanilla ice cream)

no pectin, no lemon, no problems strawberry jam


I like strawberry jam that is kind of chunky, not too sweet, edging on tart and with the crunch of little strawberry seeds that get stuck in my teeth too often. A couple weeks ago, when my father came home with a giant box of tart, wild strawberries, I immediately had a flashback to the time he brought home a heaping bag of wild sour apples. Jam, a voice screamed in my head. Make jam! 

When you make fruit jam, you need a polysaccharide called pectin to help the fruit develop into that syrupy, jam-my consistency. Some fruits are inherently high in pectin, like apples and citrus, while others, like berries, have very little. Strawberries have very little pectin.

Sometimes, people will add combine low-pectin fruits with high-pectin fruits to make jam. For instance, many strawberry jam recipes will ask you to add either a packet of pectin or some fresh lemon juice. If you're like me and don't have either in the house - the good news is that you can transform your strawberries into a lovely jam even without either of those ingredients. Instead, you can use corn starch or arrowroot powder to achieve the same low viscosity with your fruit.

"No pectin, no problems" Strawberry jam (adapted from Whole Lifestyle Nutrition)
2-3 cups strawberries, washed and de-leafed
1 Tbs arrowroot powder
1 Tbs water
1/4 cup white granulated sugar

1. Process the strawberries until the desired consistency. I left mine a bit chunky; they will break down further during cooking anyway.


2. In a pot, combine the strawberry puree with a little bit of water. Bring to a boil while stirring occasionally. Let it boil and condense for 10-15 minutes.
3. In a separate bowl, mix the arrowroot powder and water until smooth.


4. Mix the arrowroot mixture into the boiling strawberries. After 30 seconds, take the pot off of the heat.

5. Let the jam mixture cool for 5-10 minutes. Then, pour into jars and let it cool further at room temperature before refrigerating. The jam will continue to thicken as it cools. Enjoy!

Friday, June 19, 2015

dark chocolate granola bars


Despite living 10 minutes from a big grocery store, my father insists we buy our oatmeal in bulk from Walmart's website. Yes, we go that far to save on oats. The only problem is, every time, our oatmeal arrives smashed. Why? Because brown crumpled paper is, and never was, sufficient package cushioning. Now if only someone would let Walmart know.


Anywho. Now that we have a year's worth of oatmeal in the kitchen, I figured the logical next step was to make granola bars. Specifically - chewy, dense dark chocolate granola bars. They're packed with delicious energy-rich ingredients ingredients. You will need a glass of milk with these.


Yum!
chocolate granola bars
2 cups oats, toasted
2 cups dates, pitted
6 Tbs cocoa powder
1/2 cup walnuts
1/4 cup honey
3 Tbs peanut butter
3 Tbs chocolate hazelnut spread
Optional: 1/4 tsp cinnamon, 1/8 tsp ginger, chocolate chips/carob nibs

Yields approx. 12 medium bars

1. Pour the oats onto a baking tray or piece of parchment paper, and toast the oats at 350 F for 10-15 minutes.
2. In a food processor, process the cocoa powder, dates and walnuts into small pieces. I recommend mixing the cocoa powder with a tiny bit of water, so the powder doesn't go flying everywhere (lesson learned); no one wants to inhale that stuff.

3. In a bowl, mix the processed mixture with the oats.
4. Heat the honey, chocolate hazelnut and peanut butter in a microwave at 10 second intervals, until warm and less viscous.
5. Pour the liquid mixture over the dry mixture. Mix well until ingredients are dispersed throughout and come together into a sticky clump. It may take a bit of arm power to thoroughly incorporate everything.


6. Pour the granola bar mixture into a 9x9 pan lined with parchment or wax paper (I re-used the parchment paper used to toast the oats), and flatten the granola evenly. Let it sit in the fridge for a few hours until firmed up.
7. Cut into bars, and enjoy! :)